AI-powered Editor
Learn what every single button does, and what their hotkeys are so you can save even more time.
How to access
Every time you generate an article, you'll be automatically redirected to our AI-powered editor when the article's finished generating.
To edit previous articles, just go to your articles, and pick an article to edit.
Editing
Light/Dark mode
Next to the Open Assistant on the top right is a toggle button to toggle the editor in light/dark mode. It's recommended that when you copy/paste the HTML or text, you do it in light mode, otherwise the dark background gets carried over (publishing to Wordpress won't carry over the dark background).
Assistant
The assistant can be opened and closed with the button on the top right. The assistant gives you stats on the readability and SEO viability of your article, as well as a tab to see your previous text replacements.
Basic markdown support
To save you time, the editor auto-detects when you try to add markdown to the document and will automatically format the document to your liking (similar to Dropbox Paper). As a refresher:
# some textcreates an H1 title with "some text" as the title.## heading 2creates and H2 with "heading 2" as title.- This pattern repeats up to 6
#s for H6.
- Add
*or-to start a bulleted list. - Add
1.to start a numbered list. Or add13.for example to start a numbered list from 13.
You can press the tab key to indent list items or shift+tab to unindent them. More complex markdown, like tables, code blocks, are not yet supported.
Images
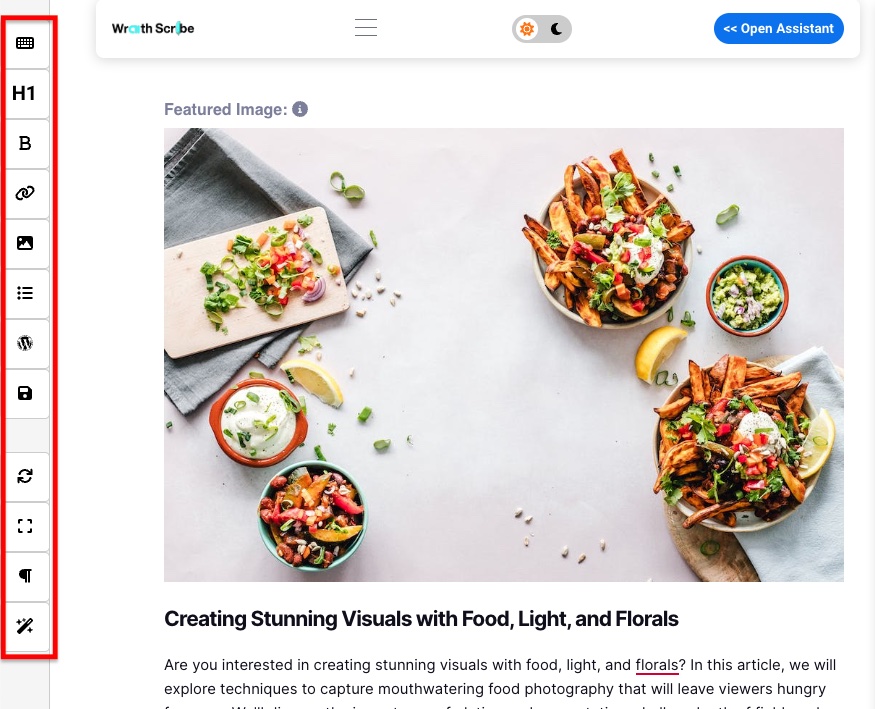
Featured image
By default, generating an article will create a featured image for you for publication on Wordpress. It'll be filled with an SEO-optimized alt-text. The featured image sits at the top of your article. To modify it, you have 2 options:
- Click on the image to bring up the royalty image search.
- Optionally modify the alt-text for the image if you'd like.
- Type in the search bar of what image you want to search for.
- Click on an image from the results to swap out your image.
- Drag/drop a file from your computer to the featured image to swap it out. It may take a few seconds because we upload it to Amazon S3 so your image is more portable.
Images in the article
In addition to using the button in the toolbar to add an image to your cursor, you can also simply either:
- Drag/drop a file from your computer to the article to upload an image.
- If there's already an existing image in the article, you can simply click on it to bring up the royalty-free image search where you can modify the alt text or search for a new image to swap it out.
Tools
The buttons show below are in top-to-bottom order of appearance in the editor.
Regular tools
Show hotkeys
Clicking on this button shows hotkeys you can use while editing. This lets you save time by not having to use your mouse for most actions.
Create headings
- Highlight some text you'd like to turn into a heading.
- Hover over the
H1button and you can see options forH2throughH6. - Click on one of the buttons to turn your text into the desired heading.
The editor is markdown-powered as well, you can easily create headings simply by using # or ## in your text (for H1 and H2 respectively).
Bold , italicize , underline text
- Highlight some text you'd like to format.
- Hover over the button and you can see options to italicize or underline the text.
- Click on one of the buttons to turn your text into the desired format.
Note that you can just use ctrl + b to bold, ctrl + u to underline, and ctrl + i to italicize as well (cmd if you're on Mac).
Adding or removing links
- Highlight some text you'd like to add or remove a link from.
- Hover over the button and you'll see another button for which you can remove links.
- Click on one of the buttons to add or remove links from your text.
Add image to text
- Click on the image button
- You can either:
- Drag & drop an image from your computer to the box with the dashed borders, or
- Click on the box with the dash borders to browse your computer for an image to upload, or
- Click on the SEARCH FOR IMAGES button to open up a royalty-free image search tool to search for an image.
- Once the tool's open, just type in something on the search box, press 'enter'
- Optionally fill in the alt-text field if you want to attach an alt-text to the image
- Click on one of the images in the search results to insert the image into your document where your cursor is
Unordered or ordered lists
- Optionally highlight text you'd like to toggle having a list. If you don't highlight anything, it'll just toggle a list to where your cursor is.
- "Toggle" just means that if it's already a list, it'll remove it. And if it's not yet a list, it'll make it into one.
- Hover over to show both options for bullet-point lists / numbered lists.
- Click on to toggle bullet-point lists. Click on to toggle numbered lists.
Publishing via Wordpress , Webhook , or copy / paste
Wordpress
- Click the Wordpress button to configure your options to publish to Wordpress.
- From the dropdown, pick which one of your connected sites you'd like to publish to. (to link your Wordpress accounts to Wraith Scribe, just go to integrations and follow the instructions there).
- Modify meta description, categories, slug as you see fit.
- Pick whether you want to publish it as a draft, as a WP page or post, or add a table of contents.
- Press PUBLISH to publish your article with the above configured settings.
Webhook
- Hover over the Wordpress button to reveal the webhook button . Click on it.
- From the dropdown, pick which one of your connected sites you'd like to publish to. (to link your site to Wraith Scribe, just go to integrations and follow the instructions there).
- Modify meta description, categories, slug as you see fit.
- Pick whether you want to request Google to index the blog post as soon as it's published. Note you need to connect a Google account to your webhook account to do this. Also done in integrations.
- Press PUBLISH to publish your article with the above configured settings.
Copy/paste
- Hover over the Wordpress button to reveal the copy button
- Click on the button to copy the HTML for your post.
- Paste your HTML'd post anywhere you want with
ctrl+v(cmdon a Mac).
Save article
Click the button to save your article. Alternatively, just press ctrl+s to save the article (cmd for mac).
NOTE: manual saving is not always required. Your article should save ~3 seconds after your most recent edit.
AI-powered tools
Paraphrase or simplify text
- Highlight some text you'd like to modify.
- Hover over the button and you can see options to paraphrase or simplify the text.
- Press the button to paraphrase the text, and to simplify it.
- Wait for the AI to finish thinking.
- If you're happy with the results, press Replace Text to replace your text. If you'd like to try again, just press the RETRY button until you find a result you like.
Alternatively, for step 3 you can use hotkeys as displayed in the show hotkeys button to paraphrase or simplify your text.
Expand text
- Highlight some text you'd like to expand.
- Press the button to expand the text.
- Wait for the AI to finish thinking.
- If you're happy with the results, press Replace Text to replace your text. If you'd like to try again, just press the RETRY button until you find a result you like.
Alternatively, for step 2 you can just use hotkey ctrl + e (cmd + e on a Mac) instead.
Turn bulleted list into paragraphs
- Highlight some list you'd like to convert.
- Press the button to convert the text into a longer form paragraph.
- Wait for the AI to finish thinking.
- If you're happy with the results, press Replace Text to replace your text. If you'd like to try again, just press the RETRY button until you find a result you like.
Alternatively, for step 2 you can just use hotkey ctrl + p (cmd + p on a Mac) instead.
Insert target keyword to text
- Highlight some list you'd like to add a keyword to.
- Press the button.
- Type in the keyword you'd like to sprinkle into the highlighted text.
- Press enter.
- Wait for the AI to finish thinking.
- If you're happy with the results, press Replace Text to replace your text. If you'd like to try again, just press the RETRY button until you find a result you like.
Alternatively, for step 2 you can just use hotkey ctrl + shift + o (cmd + shift + o on a Mac) instead.